What is offline address book? Its a copy of address book that allow us to download via outlook client. The main use of offline address book is to allow access address book when the users are disconnected from the network or when they are working offline/cached mode.
OAB has evolved thought various versions like OAB Version2, OAB Version 3 and now its OAB Version4. OAB Version 4 was introduced in Exchange 2003 sp2 and same is still continued in Exchange 2007 and Exchange 2010.
Microsoft Introduced the concept of Web-based distribution point from Exchange 2007, it has various advantages over legacy public folder distribution, thought its still supported. Web-based distribution is the most effective and stable way to create, configure and download OAB. Web-based distribution supports more clients, consumes less bandwidth. The OAB is virtual directory in the client access server. This virtual directory is created on default website in IIS and configured for Internal Access.
Before we configure Multiple OAB lets try to understand how OAB generation and web-distribution works together and how outlook downloads the OAB to its client machine.
1. First Mailbox Server in the Organization is identified as OAB Generation Server. (generally moved to different server later point)
2. OABGen service running on the mailbox server helps to generate, creates and updates OAB files. OABGen service is part of the System Attendant Service. All OAB Generated file by default will be located at path “\Program Files\Microsoft\Exchange Server\V14\ExchangeOAB”.
3. OABGen communicates with the active directory and generates the address book for all the mailboxes, contacts and other exchange resources in the Exchange organization.
4. OAB files in the mailbox server are compressed file with the extension .LZX format.
5. OAB files are generated in Exchange 2010 Mailbox servers and outlook do not connect directory to the mailbox servers. The solution approach is to use Client Access Server role with web based distribution.
6. On every Client Access Role server, a virtual directory called OAB runs within the default web site. This virtual directory helps in distributing the OAB
7. Do you think we got the complete answer ? No. How does the OAB virtual directory gets the OAB data files from the mailbox server.
8. The answer is, Microsoft Exchange File Distribution Service running on the Client access Server.
9. Microsoft Exchange File Distribution Servers polls the OABGen Server and copies the OAB data from the mailbox servers to CAS server. Once the complete OAB data is copied then if there is any update then only that data is synchronized with CAS server. The synchronization or poll frequency is 8 hours by default and you can change it if required using PowerShell cmdlets or Exchange console
10. Outlook clients uses the web https URL of the web distribution point and it downloads the OAB into the local computer.
Lets create and configure a new OAB for Particular region and the same configuration steps can be replicated in various region based on the requirement(to create multiple OAB). The main idea is to avoid having mutiple CAS (Multiple web-distribution point) servers in each region pinting to one OAB generating server. Each of the web-distribution server from different region will have to contact the centralized OAB generation server to get the updates. To avoid this scenario we can create additional OAB generating server in each region and configure web-distribution servers pointing to OAB generating server in the local region.
In the below configuration we have a AD site “India” and will be creating a new OAB and will point all the web distribution points to it
| Sl. | Server name | Role | AD site |
| 1. | KEXCHDC | Domain Controller | India |
| 2. | KEXCHHC | Hub transport server and Client access server | India |
| 3. | KEXCHMHC01 | Mailbox Server | India |
Below is the following activities we will be performing
1. Creating new Offline Address book and configuring web distribution point
2. Updating the address book
3. Configuring mailbox Databases with new OAB
4. Downloading OAB and verification from outlook client
1. Creating Address book and configuring web distribution point
We can create and manage offline address book (OAB) using PowerShell cmdlets. To create a new Offline address book , use the cmdlet New-offlineaddressbook. Below cmdlet creates a new OAB “India – OAB” on a Mailbox server “KEXCHMHC01” and it also adds default global address list into the OAB. Figure 1. show the execution result of new-offlineaddresbook cmdlet. Its throws the warning “OAB needs further configuration and users will not be able to download offline address book”. At the moment OAB not configured for web distribution or public folder distribution, this can be ignored at the moment.
|
Figure 1. Create new OAB “India – OAB
We created new OAB “India – OAB” and now lets configure it with web-distribution points. Before we configure it we need to get the list of all web distribution servers for India region. Below cmdlet queries all the Client Access(web distribution servers) in the India AD site and assigns to the variable $IndiaCasServers. Figure 2 has the execution summary of the same
|
Figure 2. Get the list of all the Web distribution servers in India AD site
Now we create the list of OAB virtual directory from the CAS server list $IndiaCasservers into the array $result
|
Figure 3. Get the list of OAB Virtual directory for all the CAS Servers
Its time to configure CAS server OAB Virtual directories with the Offline address book. This will also enable to OAB for web distribution. Below is the reference cmdlet and Figure 4 show the execution result.
|
Figure 4. Configures offline address book with the CAS OAB virtual directories
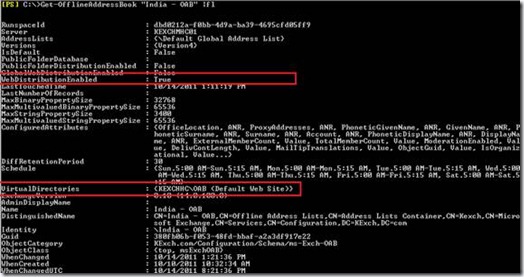
Lets check out the properties of the new offline address book and you should be able to see WebdistributionEnabled is set to True and Virtualdirectories is also configured with the CAS server OAB virtual directories. Figure 5. Marked with red shows the same.
Figure 5. OAB “India-OAB” Properties details
2. Updating the address book
Updating offline address book is the process to force update the offline address book immediately. As we just create a new OAB, it has to be updated with all the recipients in the organization. Update process communicates with the Active directory and get all the recipient like mailbox, contacts etc. and updates itself. Its normally scheduled to run once a day and you can change the schedule depending on the size of the OAB and organization requirement.
Below is the PowerShell cmdlet to update “India – OAB” immediately and figure 6. shows the execution details of the same.
|
Figure 6. Updating offline address book
The new OAB “India-OAB” has updated itself with the latest information and this information has to be replicated to all the CAS Server. To force update of the CAS server we need to use the below cmdlet which executes update-file distribution service on all the CAS server in the India region and figure 7. shows the execution result of the same.
|
Figure 7. updating File distribution service
3. Configure mailbox Database with new OAB
As we have successfully created, configured and updated the new OAB. Its time to configure the mailbox databases with the new OAB. With the below cmdlet we get all the Exchange database in the India region and configure with the new OAB “India – OAB” and figure 8. shows the execution summary
|
Figure 8. Updating Exchange database with new mailbox database.
4. Downloading OAB and verification
Lets verify using outlook to see if we can download the new OAB and we can also verify the OAB Distribution point URL
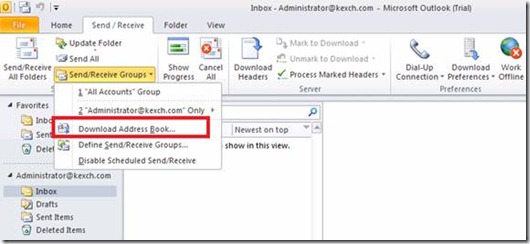
Access user mailbox using outlook and click on send/receive from the menu and click on Download Address book. Make sure you are accessing mailbox which is located in the database which are configured with OAB(above). Figure 9. shows the snap of the same.
Figure 9. Process to download OAB using Outlook
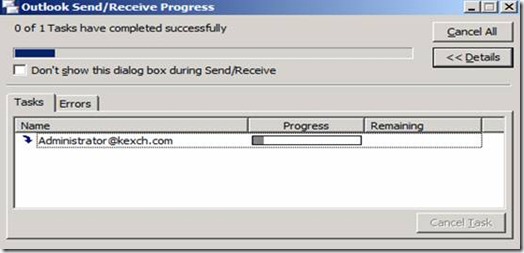
You should be able to see outlook downloading the OAB into the local computer.
Figure 10. Downloading OAB files into local computer
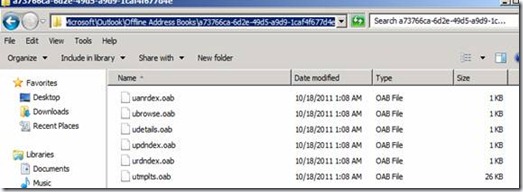
Outlook OAB file are stored in the default location “\Users\<username>\AppData\Local\Microsoft\Outlook\Offline Address Books” with the extension .oab.
Figure 11. OAB file in the user computer
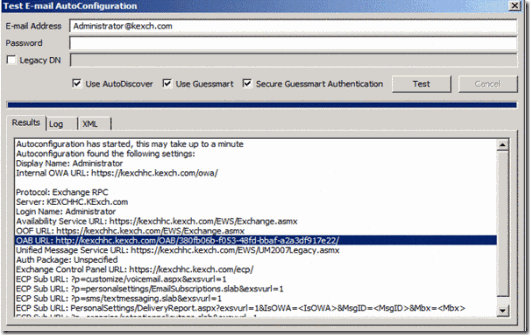
We can always find outlook connecting CAS and OAB URL path. Right-click the Outlook icon in the System Tray and select Test E-mail AutoConfiguration and then click on “Test” button on the Test E-mail Auto Configuration as shown in the figure 12. OAB URL is the path OAB distribution point details.
Figure 12. Test E-mail Auto configuration execution result
With this we have successfully created and configured new OAB for a particular region. If you need for multiple region then the same configuration can be replicated. Some times OAB may trouble you some times and it may not update itself. Some of the basic troubleshooting step is rerun the update-offlineaddressbook powershell cmdlet, restart file distribution service and may try force the AD replication. I hope you like to article and you can use this in a real time scenarios
![]()


